Step 1: Wix Website Editor setup
Disable Quick View
Follow the steps here: https://support.wix.com/en/article/wix-stores-customizing-the-quick-view-in-the-product-gallery#disabling-quick-view
Product Page settings
- From your Wix Website Editor, go to the Product Page
- Click anywhere within the product section, and two options should show above your cursor
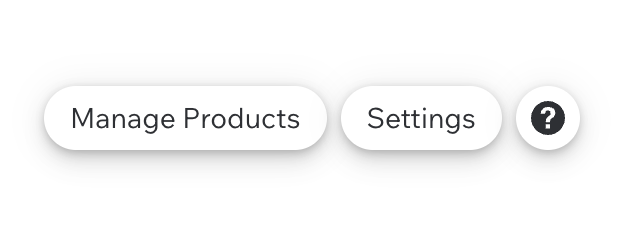
- Click the Settings button to go to the product page settings
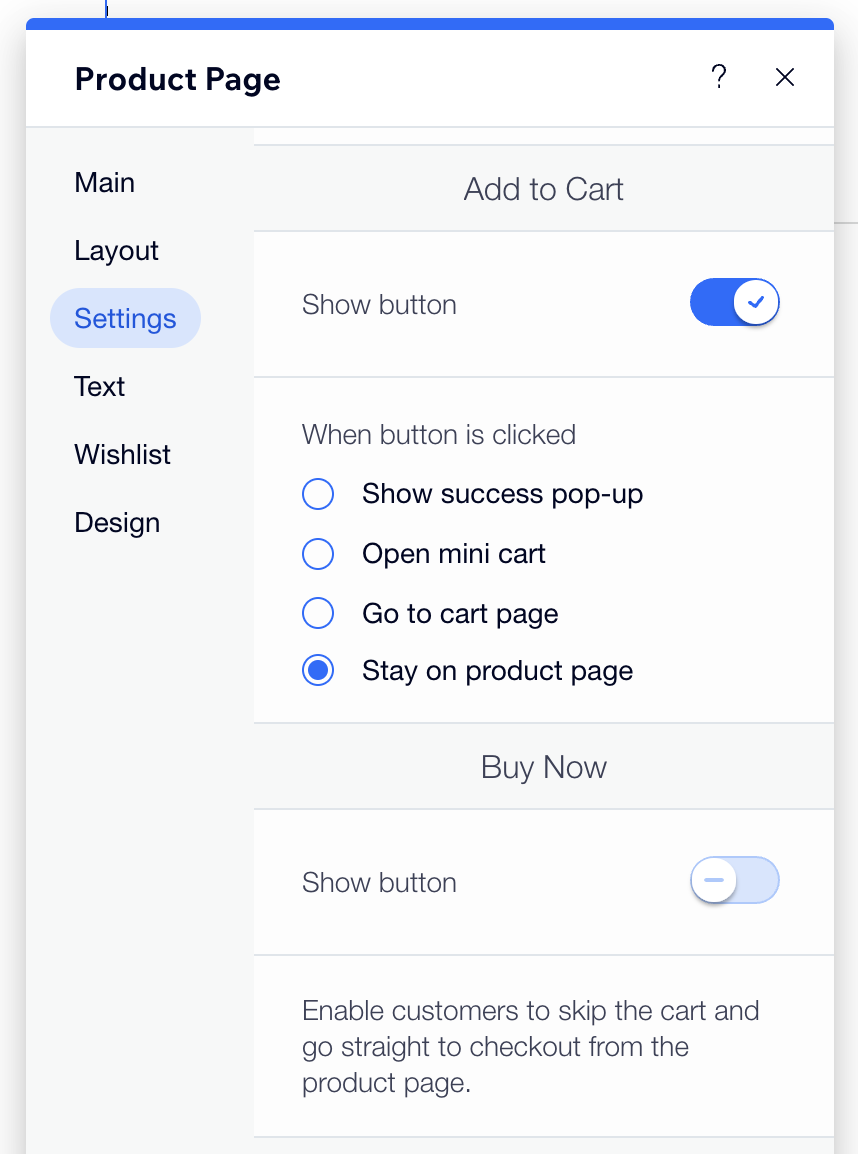
- Click Settings from the side bar
- Scroll to the "Add to Cart" section
- For the "When button is clicked" setting, select the Stay in Product Page option
- Scroll to the "Buy Now" section
- For the "Show button" setting, toggle it off
Step 2: Add Foxy code snippets
There are two code snippets need to be added to your Wix website.
Foxy loader.js file
- From your Wix Dashboard, go to Settings > Custom Code (under Advanced)
- Click the Add Custom Code button at the top right
- From your Foxy admin, go to the Sample Code page and copy the code snippet from Step 1 (code from Step 2 is not needed for this tutorial)
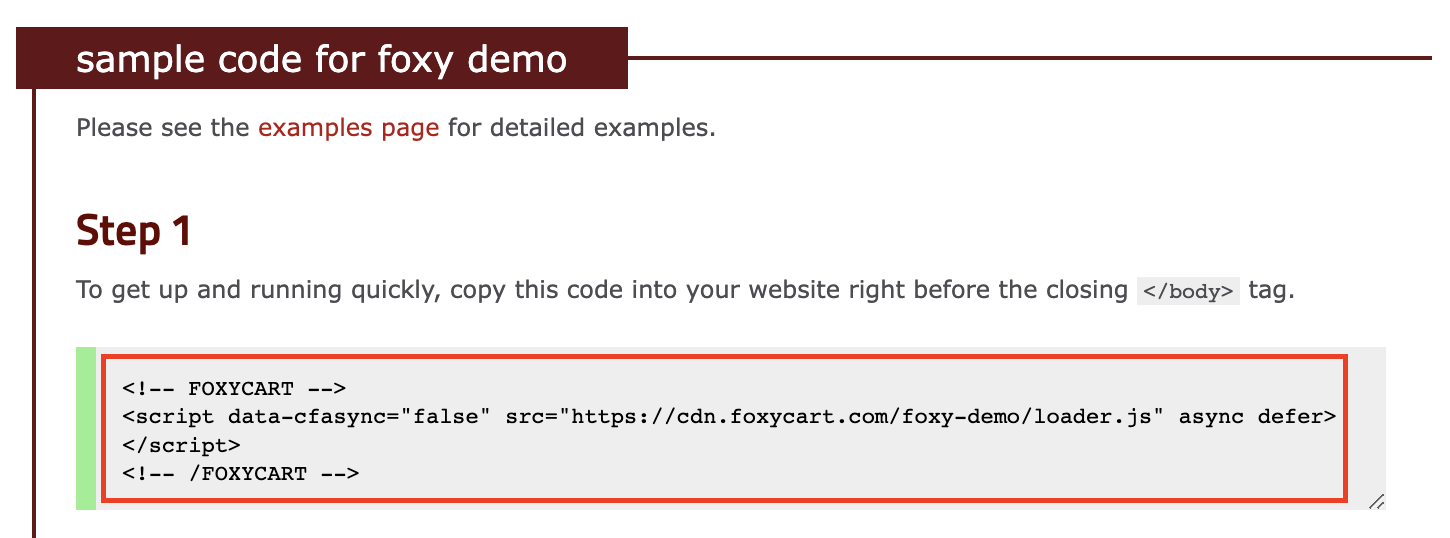
- Go back to the Wix settings page, then paste the code from the previous step in the text box
- For the "Add Code to Pages" setting, select All pages and Load code once
- For the "Place Code in" setting, select Body - End
- Click Apply
Foxy + Wix integration code
- From the same Custom Code settings page, click the Add Custom Code button again to add the second code snippet
- Copy the code snippet below and paste in the text box
- For the "Add Code to Pages" setting, select All pages and Load code on each new page
- For the "Place Code in" setting, select Body - End
- Click Apply
After finishing the steps above, you should be able to add products to Foxy cart by clicking the "Add to Cart" button on the product page.
Optional: Update product inventory with Make
- Open this link to the Make blueprint file: Make blueprint. On the file page, right click and choose Save As... from the menu to save the file on your computer
- Login Make and create a new scenario
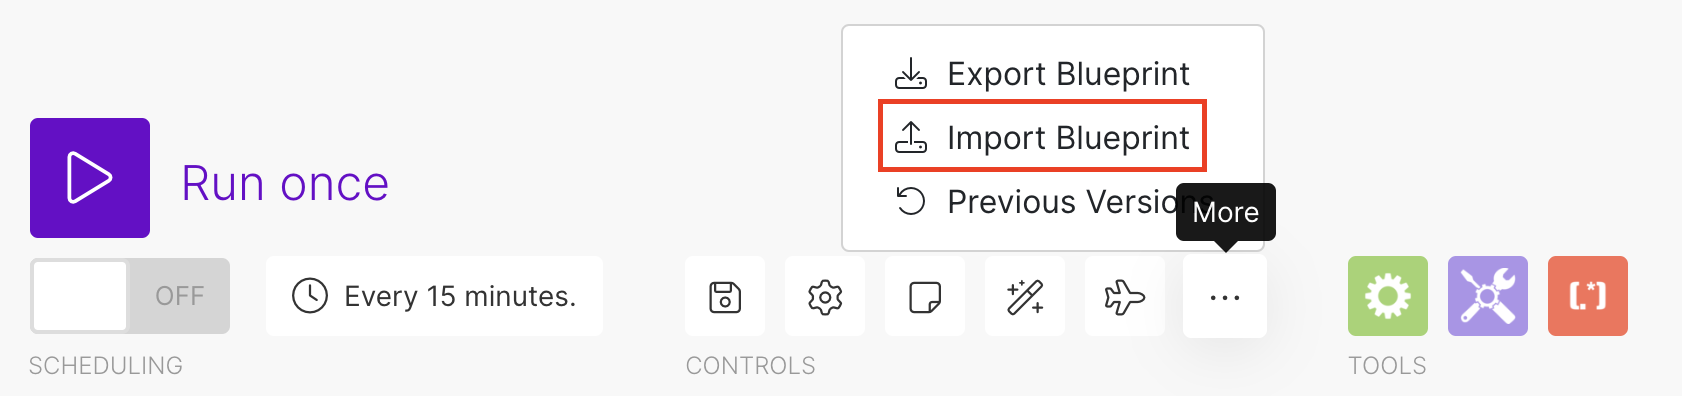
- From the controls at the bottom, click the More button and choose Import Blueprint
- Choose the downloaded blueprint file and click Save
Update the Foxy New Transaction module
- Select the Foxy New Transaction module
- Click the Create a webhook button
- Give this webhook a name (ex: Foxy Transaction Webhook) and Save
- Click the Copy address to clipboard button
- From your Foxy admin, go to the Integrations section
- Under the "webhooks next" section, check the checkbox for JSON Webhook then click the Add one more URL button
- Give this new webhook a name (ex: Make) and paste the URL copied from Make. For the "Subscribed resources" setting, make sure Transaction is selected
- Click the Update Webhooks Next button
- We now need to feed a transaction to the webhook so it can be read by Make. Complete a transaction (test or live) on your store. This will send the data over to your Make webhook. (If you ever need to do that again in the future, you can go to the “transactions” section of the Foxy administration and expand a transaction. Under the “Webhooks” section of the transaction, check the box for your Make webhook and click the “Refeed selected webhooks” button.)
- Go back to Make, and you should see that Webhooks module has updated to show that it’s received the data.
Update the Search Wix Products module
- Go to Wix Developer Center and login with your Wix credentials
- From the navigation bar at the top, toggle Build Apps and go to My Apps
- Click the Create New App button
- From the left sidebar, go to the Permissions page, then click the Add Permissions button
- Select Filter by category and choose Wix Stores from the dropdown
- Check the scope of Manage Products and Save
- From the left sidebar, go to the OAuth page
- In the App URL field, enter: https://www.make.com/en/integrations/wix
- In the Redirect URL field, enter: https://www.integromat.com/oauth/cb/wix
- Click Save
- Copy the App ID and App Secret Key
- Go back to Make, select the Search Wix Products module and click Create a connection
- Paste the App ID and App Secret from Step 11
- Click Save
- From the pop-up window, select your Wix site and Agree & Add the app
- Click OK to close the module
Update the Custom JS module
- Select the Custom JS module
- In the X-RapidAPI-Key field, use the test API key or follow this guide to get your own API key
- Click Save then OK
Update the Update Wix Product Inventory module
- Select the Update Wix Product Inventory module
- Choose your Wix connection from the dropdown
- Click OK
Now you can complete a transaction from you Wix website. After completing the checkout, inventory in Wix should be updated.